Are you stuck in a daily hustle and need some time to take care of yourself? Or are you more of a stay-at-home mom with no spare time? Well, whatever busy lifestyle you have, that doesn’t mean you can’t have perfectly polished nails.
Whether it be around the house chores or making zoom calls for business, don’t forget to make sure those nails look stunning! Perfectly painted nails can instantly elevate your look and some nail colors can help you express your mood and personality. By painting your own nails at home, not only will it save money and time but it’s an easy task accomplishing gorgeous results.
Learning how to paint your own nails without going out of the comfort of your own home is a skill worth mastering!
How To Paint Nails At Home: Top Tips
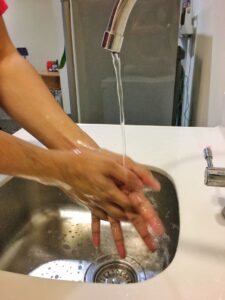
Wash your hands and make sure your nails are free of any dirt, oils, or debris
Starting with clean nails is essential for maintaining their health and appearance. Before you start any nail care

This simple yet really important step creates the perfect foundation for further treatments, allowing your chosen nail care products to work most effectively. When your nails are clean and tidy, and you push back your cuticles, you are paving the way for long-lasting manicures, stronger nails, and overall improved nail health. So, remember the mantra: a clean nail is a happy nail!
Choose a nail polish color that you like and make sure the bottle is still in good condition before using it.
Selecting the perfect nail polish color can feel like a daunting task with a seemingly endless array of options. However, the key to finding a shade that complements your personal style also lies in selecting a bottle that is still in good condition. As nail polish ages, the consistency can change, potentially leading to uneven application and subpar results.
To ensure the best quality, check for the consistency of the polish by rolling the bottle between your palms and observing the fluidity. Also make sure the brush bristles are intact and that the cap seals properly to stop any air from entering and compromising the polish’s quality. By taking these steps, you can confidently choose a nail polish color that reflects your taste and enhances your self-expression.
Apply a base coat to ensure that the nail polish adheres well to the nail.

Applying a base coat is an essential step in achieving a flawless manicure, as it significantly enhances the adherence of the nail polish to the nail. By creating a smooth and even surface on the nail, a base coat not only ensures the longevity of the nail polish but also helps prevent chipping or peeling.
It also acts as a barrier between the nail and the colored polish, protecting it from potential staining and maintaining the overall health of your nails. So, next time you decide to pamper yourself with a vibrant nail color, remember to start with a base coat to enjoy a fabulous and long-lasting manicure!
Use two thin layers of nail polish, allowing each coat to dry completely in between applications.
Achieving a flawless and long-lasting manicure can be surprisingly simple with a little patience and the right technique. One crucial tip to keep in mind is applying two thin coats of nail polish, ensuring that each coat dries completely before moving on to the next one. This method not only helps the polish adhere better to your nails, but also prevents it from chipping or peeling prematurely.
It also allows for better control over the opacity and depth of color, resulting in a professional-looking finish. So, next time you go for a DIY manicure, remember to take your time applying thin, even layers of polish, and watch your nails dazzle with shine and durability.
Finish off by applying a top coat to protect your manicure and prevent chipping.
A flawless and long-lasting manicure is something we all strive for, and the secret to achieving that lies in the finishing touch – applying a top coat. This transparent layer serves multiple purposes: it not only adds an extra shine to your nails, but also creates a shield to protect your nail polish from chipping, peeling, or fading.
By sealing the surface of your nail, this extra layer of defense ensures your hard work and creativity aren’t wasted and guarantees your manicure continues to dazzle and shine for days to come. So, next time you’re pampering yourself with an at-home manicure, don’t forget to finish strong by investing in a high-quality top coat that promises lasting protection and an eye-

Follow up with cuticle oil to keep your nails healthy and hydrated.
Nurturing your nails is crucial to maintaining their health and appearance, and incorporating cuticle oil into your care routine can make a significant impact. It is specifically designed to keep your nails strong and hydrated by penetrating the delicate skin that surrounds the nails. Regularly using cuticle oil not only encourages vibrant cuticles, but also assists in stimulating healthy nail growth, reducing the chances of breakage or splitting.
It also helps combat the everyday wear and tear we put our hands through, like frequent hand washing or exposure to harsh chemicals. So, make it a habit to follow up your nail care regimen with cuticle oil and witness your fingertips flourish with vitality and resilience.
Now you can paint your own nails at home!
With a few simple steps, you can give yourself a beautiful manicure at home that will last for days. The key is to use clean nails, pick the right polish, and apply thin coats of each layer. In addition to applying base Coat, two thin coats of nail polish and a top coat, remember to finish off with some cuticle oil so your nails stay hydrated and healthy. Even if you’ve never given yourself a manicure before, you can create salon-style results at home by following these steps and taking your time. So go ahead and show off your freshly painted nails – you have all the tools to start painting your own nails today!


Recent Comments