Everywhere you turn, business and homes have people creating a feature wall and some make it look easy. Others make it look incredibly difficult and unattainable.
I’m here to tell you, it’s really easy to create a feature wall that will have others wanting to come take all the pictures! All it takes is a little wallpaper, a bit of patience, and a love to see something different. I will tell you ahead of time, not all wallpaper is created the same. And can cause several curse words to get the perfect look if you aren’t careful!
How to Easily Create a Feature Wall
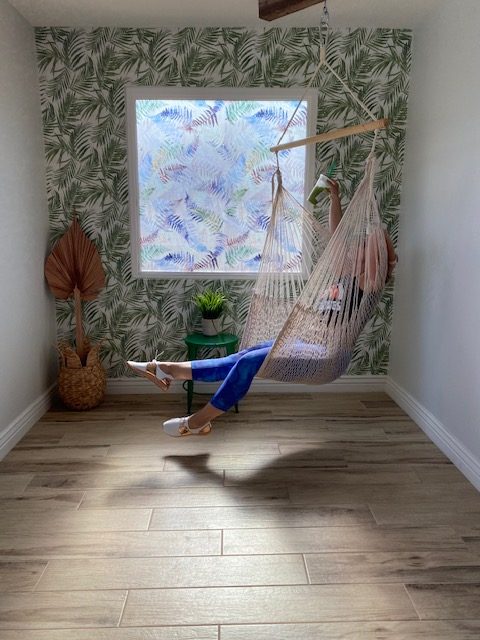
My vision and dream was to create a wall and space in our Short Term rental property which made people feel like they were in an Instagram or blogging scene every day they wake up. I wanted it to look boho and islandy, and beachy, yet still comfortable. I knew I wanted to include wallpaper, palm tree frawn, wicker, and several plants. Because it is a short-term rental and I can’t expect my guests to water the plants. So I knew fake plants were going to be the way. And honestly, when doing home decor, the most low maintenance is often the easiest focal point to create.
I had a color scheme of green, white, and copper in my mind, and even mixed in a bit of blue and brown for the wicker color. What I didn’t plan on adding but realized they worked so well were pink flowers, and a yellow polka dot pot. It’s important to have coordinating colors in small spaces to not overwhelm the rest of the room or home.
This room has another end that has completely different accent walls and is right off the living room making it important to have fun but coordinating living spaces, even if you don’t see it in these photos. If you’ve been thinking of doing the same, here’s how to add a feature wall.
Feature Wall Wallpaper
Wallpaper has come a long way since I was a kid back in the 90s when wallpaper was at an all-time high in popularity. The wallpaper feature I remember was at the top of the ceiling in a thin strip down the wall. Or above the chair rail. Not often did you see an entire wall or a single wall covered floor to ceiling in wallpaper.
Things have changed quite a bit. Many people are using wallpaper to create beautiful experiences in their homes and entire walls as I did on a few walls in our short-term rental. A good wallpaper today can feel like a real piece of art.
Peel And Stick Wallpaper
I chose to use a peel and stick paper instead of one that needed paste or something complicated. Because this was my first time working with wallpaper, I wanted something that could remove and restick if it wasn’t right the first time.
I also chose the peel and stick in case I ended up not liking it and I would be able to remove it easily. If you need to remove wallpaper and restick it, you can get the adhesive to help keep more stickiness if it’s gone. This is the best pro tip I could give you, because after all, applying wallpaper takes real practice!
My favorite brand was Scott Living by the Scott Brothers. It was super easy to work with, had good repeating patterns, and had enough stickiness if I needed to remove and fix. This is the exact one I used on this wall. My next favorite is NextWall and it was a bit harder to work with when I needed to move and manipulate it. The least favorite was the Opalhouse line by Target. It is hard to work with, not easy to pull up and reapply. But I figured it out after a while.
This photo shows this chair, but I’ve moved it somewhere else in the house 🙂
Feature Wall Accessories
Once you decide what wallpaper and which wall you want to create, apply the wallpaper completely. Depending on the vibe you are trying to create, choose where you want to put your accessories like plants, flowers, chairs, etc. Because I was creating a corner and space, I didn’t add anything to the feature wall other than a window cling of colored palm prints. If you want to let the light in, it’s not necessary to do the window film like I did, however, I think it pops even more. Here’s the one I used.
I then added a hanging boho chair a bit in front of the wall for people to sit and have a moment. Little side note about this chair – I actually bought it back in January of 2018 and never hung it. It sat in the box until I opened it to hang in this spot. Guess it was just meant to be here all along and I didn’t know it! If you don’t have a large beam lying around, make sure you grab this hanging set. And ensure you find a stud to hang on so it doesn’t fall down.
On the opposite side of the room, I spaced out floral rings and hung a boho print from a local artisan here in Arizona along with my fake succulents. Remember to choose accessories of all shapes, sizes, and colors to really bring the wall together and draw attention to the cool vibe.
I finished the feature area off with a table I spray painted green from white. Added a few plants to the table, a little pineapple basket, a smaller basket with a throw blanket. A DIY copper spray painted palm frawn, a cute pillow from Ikea, and a white side chair and rug.
Here’s a little more detail on that spray painted table.
I started with this basic white metal table I picked up from Home Goods and picked out the Rustoleum Meadow Green after looking through the various green paint colors. Then spray painted it 2 coats to ensure the color would stick and be even. Then I let it dry outside about 30 minutes. Because it doesn’t take long in the Arizona summer heat to dry and cure!
I probably spent $100 total on the whole wall and got lucky to snag the palm frawns the day the tree climbers were out cutting the palm trees in the neighborhood for no more than a few prickles in my finger!
The palms started out as regular frawns off the tree. And I used scissors to shape them the way I wanted. And spray painted them with a copper spray paint to hopefully seal them and keep them like this for a long time. If you look close in the final photos, you will see another frawn behind the swinging chair. That one I used a glitter spray paint on and it just dusted the frawn with a gold glitter. And kept the green color. The exact color I used on the frawns was Pearl Champagne Pink, which makes these really pop!
More Feature Wall Ideas
boho feature wall
beachy feature wall
board and batten accent wall
modern accent wall
wood accent wall / wood feature wall
art deco accent wall
wall mural
sports-related feature wall
These are just a few accent wall ideas and architectural elements to get your brain flowing and thinking of what to do, you could also add this in an office space or dining rooms for adding wall colors to otherwise boring walls. Oh, and lastly, you don’t have to hire an interior designer, use your imagination and Pinterest to make your accent wall ideas come to life!
If you are like me, you usually find the perfect curtain in the most wonderful print or color but the length is wrong. No matter how many times you measure your window.
I always find the most amazing curtain that’s either too short or too long.
Never the right length.
Add in custom french doors and custom windows and the length will never be found in stock in a store. I wish our dining room was standard sized, but without looking standard.
So without needing to raise or lower the curtain rods every time you want to change the curtains, or putting a drop hem in by sewing the curtains, I came up with a better solution. Custom curtains.
I bought too long of curtains.
Well, I didn’t intend for them to be too long when I purchased, but it happened.
I had a really full cart already with 2 kids at Ikea and they were an impulse purchase, but one that I really liked. But in all honesty, I don’t ever mind a DIY project either.
Making the mistake to go to Ikea on a Sunday was the first issue. It was full of people and my Mom radar was on super high as I didn’t want anyone to steal them when I was too busy looking at the length of the curtains too long.
So I grabbed the first 3 panel curtain packets I saw, and went with it. These are the ones I grabbed.
I also thought that our windows and doors were at least 96 inches long… not remembering that we had custom heights for them making them take longer to get in during construction. (I don’t know how I could forget that)
Anyways, I got the curtains home, put them up, and realized that they are a good 8 inches too long…
I did what every person would do.
Contemplated taking them down, raising the curtain rod, and sewing them. We have to have a window treatment for the french doors that lead from the open concept kitchen and living room so these door curtains weren’t negotiable.
I also put up another set of curtains panels which are 64 inches and you can see in the photo they are too short.
Taking them down isn’t an option since we wanted to watch tv without a glare and shutting out the light at night.
DIY Curtains Without Sewing
Raising the curtain rod also entails fixing the drywall and having it repainted.
Both things we’ve done about 100 times now it feels like in this process. And it’s more expensive than purchasing all new curtains – so that’s also out.
With the pandemic happening and stay at home orders in place, taking them to get hemmed professionally are not options.
So, I took to Amazon to see if I could find some double sided fabric tape to make it work.
And thank goodness Amazon came to the rescue! The tape arrived in 2 days and I set out to fix them up using a diy no sew method. I have about 8 inches to hem to make them barely drag the floor, which I think will be fine.
Personally, I believe this will work with any curtain length – valance, kitchen curtains, cafe, longer curtains, etc.
Two rolls of this tape from Amazon should do the job. If you have fewer curtains, you may need less. If you have more, see how many it will take. Other options were available, but the shipping time was longer, and we couldn’t stand the curtains being so long anymore. Here’s my step-by-step process.
I simply laid the curtain across our countertop and put a towel under it to ensure I didn’t damage the butcher block. I moved the top edge out of my way in order to protect it as well. You can also fold the top to move it out of the way. If you have an ironing board, that probably works better. We don’t, so I improvised with what I had on hand.
And the other thing you need is an Iron. We borrowed one from my Mother In Law because we only have a steamer for our clothes.
I measured out how far I wanted to bring the curtains up from the bottom hem. In my case, that was 8 1/2 inches. I put the tape at about 7 inches so I could fold the fabric, iron, and cut a new hem. I made sure to measure from the top and bottom to ensure a straight cut on the raw edges.
After cutting the hem and realizing how much new fabric was left on the folded edge, I decided to cut the new line so it wasn’t as thick looking when hanging. I reduced the edge of the fabric to just a few inches.
Final Product: Perfectly Fit
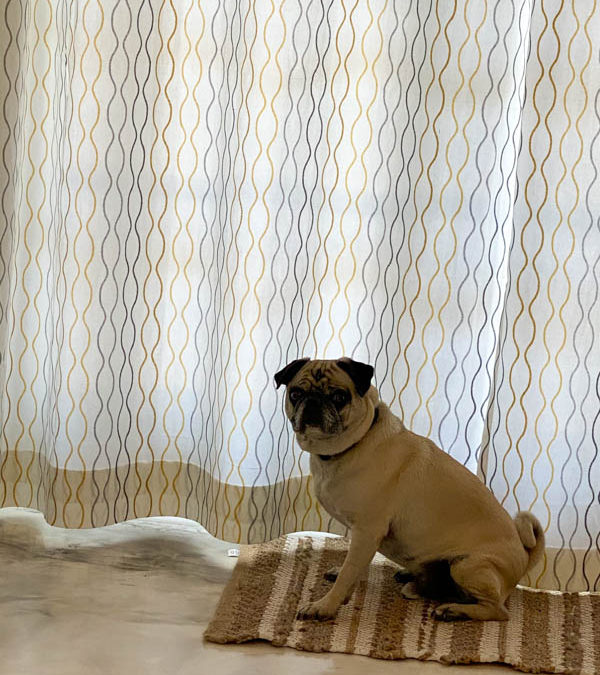
The final product is a curtain that’s not dragging the ground and custom fit to your door/window!
I will play around with the lengths as our floors aren’t completely level. For me, each door and window will need a different length.
One note – cute doggie not included 🙂
Another note, my hubby decided he wanted to help with the project and didn’t heed my instructions to cut the extra fabric, which I did mention above, and you can see the reason. Look at Champ’s face and front area versus where is tail is. The extra fabric is a bit crazy!
If you don’t want to mess with curtains and you for sure don’t want to whip out the sewing machine, you can always check out window film as an option for a window covering. I have used window film on other properties that you can tie into the home decor. They work great as DIY curtains that don’t need washing, don’t ever get dirty, and don’t have a stretched rod pocket.
Hopefully this is something you find helpful and useful in your home when doing projects or redesigning your space.
Let me know in the comments if you have other ideas to make a curtain fit a space you have.
I don’t know about you, but when I feel like things are out of place and not where they are supposed to be, I can’t think.
Or really function for that matter…
I immediately have to start cleaning and clearing so I can have clarity in my external environment. Until I’ve cleared and cleaned my space, I have a hard time focusing on the tasks at hand and even creating new things.
Clutter Clearing and Hidden Treasures
So today, after about a month too long, I cleared clutter from my office. I was able to clear out old books on topics I’ve read already. And things I’m no longer interested in reading. None of these were sentimental items, so it was pretty easy for me to let go. a
I think I grabbed about 30 books and card decks from my collection!
I also grabbed some books from my kiddos rooms that they have grown out of and took them to the resale shop. Much to my surprise, each and every book that I took into the store, they purchased!
$42 cash is what they gave me!
I know this might not sound like a lot, considering I probably paid at least that for 2 of the books in the collection. However, think about how much money I was getting for them sitting in my home….
ZERO.
Not only did I get to clear my space of things I no longer need, but I also received some money for them to put towards our new home purchase. And now, I don’t have to have as many boxes for moving in a few weeks! Major wins today 🙂
On this same note, I have a habit of hearing about something new that I can learn and buy books/programs/courses on this new thing that end up collecting somewhere and I don’t finish them. Today, I got rid of some of those books on topics I became interested in and never cracked the book after purchasing. This sometimes add to a cluttering problem, which can cause issues when your space is limited.
Be Minimalist.
My goal is eventually to be a minimalist in all facets of my life, and today is a step in that direction that it is actually possible for me to do!
I found a few websites online with the full version of the books I will need in the future. And I have a newfound appreciation for Kindle and Audible – mostly because I can do them in the car or when I’m traveling on the plane – with less clutter in my bags.
Clean One Room At A Time.
If you are like me and sensitive to your surroundings, do yourself a favor and go through one or two rooms of your house and clear them out of all the clutter.
Things you purchased and haven’t used, things that have seen better days, things you are holding for a rainy day or when you can fit into them again, or things that you have received from people who you have negative emotional attachment to, etc. Doing so will allow you to clear space out for things you actually want in your life and clean your home. You can then donate clothes and home goods which are still usable to charities who need these things for the people they help in the end. It also helps you feel better about the donation of your things and declutter your home at the same time!
If you struggle with bringing in clutter and things, it might be smart to hire a professional organizer to help you create spaces where you care happy and comfortable in your home, while also ensuring the clutter doesn’t come back.
Clean Living Environments For Healthier Self.
In addition, many studies have shown that when you have too many things in your environment, it can help manifest illnesses in your physical body.
You hold onto anger much longer than you should creating discomforts in your emotional, physical, and mental bodies.
For me personally, I would prefer my children to have less THINGS and more EXPERIENCES and memories for when they are older. Things they won’t remember as much, memories last much longer, positive or negative.
These are great reminders, especially now that the holidays are upon us, and smart to do before bringing in new toys, clothes, home decor, etc on those lists that come during the holidays.
Clean thoroughly.
Not only will cleaning throughly free up your mental capacity and reduce stress, but it will help improve your immune system to keep you healthy.
Let’s take the kitchen for example. It is one thing to simply declutter and clean. It is another to grab your cleaning products, clean the kitchen with warm water and a drop of dish soap, let it sit for a few minutes, wipe clean from top to bottom, AND don’t forget to hit the ceiling fan as well. That’s a deep clean. Sounds like a lot of work, but it also sounds live a clean living environment fit for a healthy family.
Not sure where to start? Start with your kitchen and bathroom. Then move on room by room. So, grab your cleaning supplies, utilize these cleaning tips, and get to decluttering and cleaning the house. You will be pleasantly surprised by the mental health benefits you realize later.
Clean your clutter. Clear your mind. Bring in new possibilities for you and yours. Start clean living today.
Oh! and you can even earn a few bucks to do something fun or pay a bill with the money you get from clearing your clutter 🙂 Double bonus!
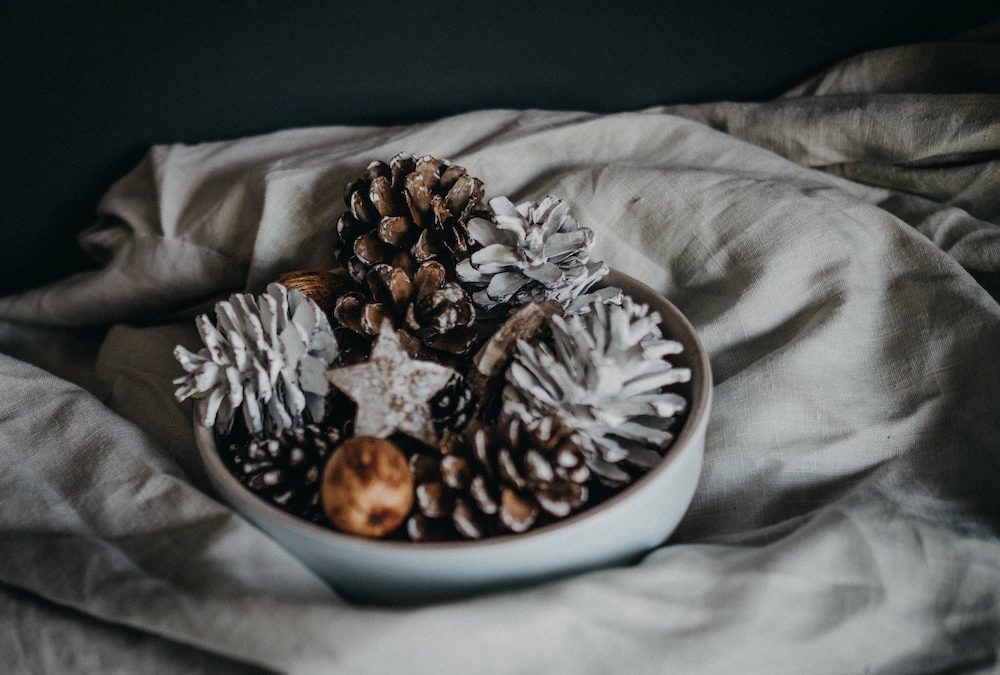
Growing up, we always had potpourri in the house, all year long, but more so during the holidays. My Mom would leave the potpourri all year long, so we would have a Christmas potpourri smell in July if you walked by the place on the table where it was sitting. As I got older, I realized holiday potpourri makes a wonderful gift idea for those on your list. I’m not talking about the store-bought potpourri though, I’m talking about homemade potpourri that leaves a wonderful home smell for all those who enter. This is an easy and thoughtful gift for friends, family, and neighbors who may be alongside a bottle of wine or liquor.
Homemade Holiday Potpourri Recipes
Before we get too much into the holiday potpourri recipe making, I wanted to let you know I do have some affiliate links here that keep me being able to do these posts for you 🙂 So if you click on something and make a purchase, I do a little dance with my girls in appreciation and gratitude!
Making holiday potpourri is a delightful holiday activity that will scent your home during the holiday season. Most of its ingredients are found in your kitchen, can also be purchased online, and in the supermarkets. Spices and packs of mixed nuts are also readily available throughout the holidays at supermarkets and specialty markets. Ingredients like juniper berries, whole nutmeg and allspice, cloves, and cinnamon sticks, when blended together, offer you a holiday potpourri that is pleasant in appearance with a wonderful festive scent.
Stovetop Potpourri: What is it?
Potpourri is a fragrant blend of spices and fruits. It can be stored in a bowl in dry form, with dried flowers, herbs, and spices. The alternate version is to make it on the stove by simmering the ingredients. It’s frequently created around the holiday season.
Stovetop potpourri, often known as “simmer pot potpourri,” is created by combining naturally scented components in a small pot of simmering water on the stove, filling your home with a delightful and all-natural fragrance. Generally, when you want the potpourri to have a scent around the home, the stove will need to be on.
Safety is one of the most critical issues. Even though the potpourri is simmering, you should not ever leave it alone and always turn off the stove at night or whenever you leave home. Keep in mind your stovetop potpourri shouldn’t fully dry out. Setting an alarm will remind you to monitor what’s happening with the stovetop potpourri and, if required, replace or add more water.
How To Make Stovetop Potpourri For Gifts
Cooking holiday potpourri in a slow cooker or on the stovetop will make your house smell like the holiday season. Just add printable gift tags to your package for holiday gift-giving.
5 minutes to prepare | 1 package of serving
Ingredients:
▢ 1) 4 cinnamon sticks (crumbled) (to release the scent)
▢ 2) 1 tbsp clove (whole)
▢ 3) 1 tsp allspice berries (whole)
▢ 4) 1 tablespoon star anise (optional, but provides a licorice-like aroma)
▢ 5) 1/2 cup cranberries (fresh)
▢ 6) 1 medium orange (whole) a transparent bag, a 250 (1 cup) Mason jar, or a recycled jam jar
▢ 7) Optional: sprigs of rosemary or evergreens
Instructions:
▢ Step 1
Leave out the cranberries and fresh orange slices when making a dried mix packet. You can also increase the amount of ground cinnamon, cloves, and allspice in the mixture. The aroma of the ground spices will be released more quickly.
▢ Step 2
Refrigerate the cranberries and orange until ready to give as a gift. The ground spices will cling to the orange and cranberries, so leave them out.
▢ Step 3
In a stove or slow cooker, combine the dried mix, fresh cranberries, and sliced orange with 2 to 3 cups of water (or apple juice). Simmer on a low flame setting.
▢ Step 4
Keep an eye on it and add more water as needed only. This recipe can be kept for several days.
How To Make Potpourri Last Longer
If you refresh the water as needed, your holiday potpourri will last 4 or 5 days. If you’re giving your holiday potpourri as a holiday gift, wrap it in craft paper or burlap and tie it off with ribbon or baker’s twine.
How Long Does it Take for Holiday Potpourri to Simmer?
four (4) days
You can usually get several hours of very pleasant aromas, but if you use the same holiday potpourri, the fragrances can last up to four days. Simply keep an eye on the water level for precaution.
What’s the best way to make holiday potpourri smell better?
To enhance the perfume and assure the fragrance’s longevity, add a complementing essential oil to the holiday potpourri mix. For every 5 cups of the holiday potpourri, add up to 8 drops of essential oil.
You can also add dried orange slices or lemon slices, for smell and aesthetics. This addition will add a clean and fresh smell, and your house will smell amazing.
Holiday Potpourri Gift Ideas
You’ll need the following items to complete the assembly:
▢ 1) Wide-mouth, Quart Jars, or cellophane gift bags – The jars are obviously more expensive, but they make the most impact.
▢ 2) Holiday Wrapper – Choose wisely between kraft paper and wrapping paper. Kraft paper is stronger, while wrapping paper tends to rip apart easily.
▢ 3) Ribbon or thread — I prefer twine for its rustic and aesthetic vibe, but you can use everything you have on hand.
▢ 4) Scissors – for cutting. Keep it out for children below 12 years old for safety.
▢ 5) Printer – If you don’t have a printer at home, you may have these printed the free printable potpourri recipe and holiday greetings card for a few dollars at your local office supply store.
▢ 6) Paper/Cardstock – I recommend cardstock over paper since it lasts longer. But it’s entirely up to you.
Jar Instructions:
Cover the jar lid with brown kraft paper, wrapping paper, or any other paper you want, seal with the jar lid band and put on the free printable gift tag with a ribbon or twine.
Holiday potpourri in a jar that smells like Christmas is one of the most simple holiday gift ideas that can be made ahead of time. So, this homemade craft is a great idea if you want to start making homemade holiday gifts early. This gift can be created year round as the seasons change with different items which are popular during the season, not just during the winter holidays!
Do you come back home after a long day at work, only to feel suffocated? Do you wish to leave home to find peace?
It’s a no-brainer that your home should make you happy; it should make you breathe a sigh of relief just as you enter the door. But if you feel differently, it’s a sign that you need to change the atmosphere around the house.
Removing toxic things, and working on relationships can certainly help if you think they are a problem. However, if you know that you live in a happy family and that your family is your comfort and strength, then let’s just say your home merely needs a few changes to fix the problem.
Here are 10 ways how you can instantly change the atmosphere in your home:
10 ways to instantly change the atmosphere in your home
1. Add music
If I say music can help you calm down, I would not be sharing any new piece of information. We all already know it and have witnessed it too. So, if you wish to change the atmosphere of your home for good, you cannot afford to miss adding music.
However, you can skip hip-hop and heavy metal; you’re not having a party in your house. Instead, you can play your favorite music, but make sure it’s calming and soothing to your ears.
2. Change wall colors
Believe it or not, décor can change the whole vibe instantly – especially wall paints. Keep a neutral color scheme around the house. It is highly suggested to go for light colors – if you ask me, white or off-white is the best. They make your home feel calming by making it spacious, and bigger.
I love to do removable wall paper or if you have less patience, like me, I started doing splatter walls, where you don’t completely paint the wall. Instead, you use a paint brush and splatter a color onto the wall to give it a different look. It doesn’t take a lot of time, and only needs to be taped and plastic the area off to ensure nothing but the wall gets the splatter. (Trust, I learned the hard way!)
3. Do home-décor right
If you have painted your walls right, you would want to get to the styling and décor. If you are looking for a calming décor – white, grey, and nude colors are in trend for their minimalist touch. So, whatever you pick, it is suggested you pick from the neutral color scheme.
Additionally, you can add plants, wind chimes,and white rugs for an aesthetic and pleasant makeover. If you are looking for additional ideas, you can scroll through Pinterest for some home-décor inspiration
4. Keep the tabletops clear
The rule is not to keep the house cluttered. Neither the floor nor the tabletops. I know, tabletops seem the most convenient place for dropping stuff throughout the day, but the more things get accumulated on the tops, the more suffocating it can get. Ergo, keep tabletops as empty as you can. You can of course add décor to it, but don’t overdo it.
5. Let your home smell mesmerizing
Imagine this, you went out, and came back home to be blessed by a mesmerizing fragrance. How enchanting would it feel? Time to make your imagination a reality. There are so many ways of doing so.
You can make your home smell enchanting using these objects
Diffusers
Essence sticks
Candles
Potpourri
Room freshener spray
Fragrance Sachets
6. Add family photos
Your home must not only smell amazing, but it must reek of the people who live there. Adding family photos is a great way of adding a personal touch to your home. You can go simple by hanging in some of the happiest, and memorable photographs, you can add a touch of décor to it by creating a gallery wall with a color scheme. Gray and white if you ask me.
Tip – You can make use of mold photo frames – they are quite in trend these days.
7. Keep your home ventilated and allow natural light
A breath of fresh air, natural light can change your mood for the better. So, if your blinds are on, or curtains are closed, undo them. Not only will it save you electricity bills, but make you feel tranquil. (I would have loved to talk more about that effect or say that feeling, but forgive me because that feeling cannot be described in words)
8. Make your home cozy
Do you jump or drop yourself down on the hotel’s bed as if you are lying in heaven and would never want to get out of the bed? Guilty, right? Well, that’s because hotel rooms are cozy. You have to do the same with all the rooms so that you feel more than just comfortable – your happiest self.
You can do that by working on the mattresses, pillows, and cushions around the house. Go for thick soft mattresses, and soft and fluffy cushions and pillows. At the same time, add a soft duvet to your bed.
9. Say words of affirmations
If affirmations can make anyone feel optimistic, how can they not change the atmosphere around the house? You can say affirmations together with your family or have them play on the speaker. You can even add décor that emphasizes these affirmations. Try to add cushion covers and quoted frames with affirmations written on them.
10. Laugh more
Décor can surely help you instantly change the atmosphere, but it cannot match the transformation laughter can bring. So go on, share some jokes, and watch some hilarious movies together. Laugh like there’s no tomorrow.
Now that you know 10 easy ways to instantly change the atmosphere in your home, it’s time to get started! Pick one or two of these tips and give them a try. See how your mood changes and how your family reacts. Once you have had some success with a couple of these methods, add more until your home feels like the haven you always dreamed of. Share which of these tips worked best for you in the comments below – we would love to hear from you!
Life can get exhausting – you work all day, walk in heels, deal with people and their tantrums, get stuck in traffic, only to come back home dead tired – both mentally and physically. Now you may not be able to take a long break, go to some faraway island, or quit your job, but what you can definitely do is come back home to spend some time in the calm, cozy, and peaceful ambiance to relax and unwind.
But a calm and peaceful ambiance? How would you create one for yourself? A clean home, perhaps? Yes, but you can do more (Don’t settle for less). You can make use of some tips to create a cozy space at home.
7 ways to create a calm and peaceful home
1. Reduce clutter
We all tend to make our home more of storage space, than a home. They are full of items that we do not use but keep for the sake of using them someday – which I bet never comes.
That’s the story of all the houses. But just so you know, lots of cabinets and tons of things can make your space look compact, which consequently might make you feel suffocated as well.
Thus, try reducing your clutter – whether they are bunches of boxes, or extra furniture lying around the house, or plenty of stationery items on your desk. Declutter every section of the home. You’ll have a peaceful atmosphere, better focus, hassle-free, and quick cleaning sessions.
If you need help and a place to start, check out this blog post I wrote about clutter clearing and how you can make some money.
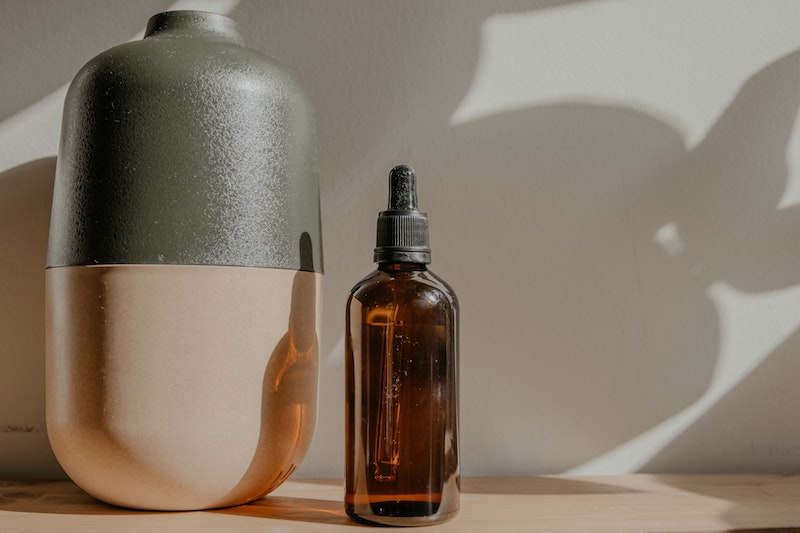
2. Use a diffuser
Diffusers have only grown popular in recent years. They are devices that produce aroma and fragrance to relax your senses. They can be electric or contain tea-lights and tea-holders to produce mesmerizing fragrances around the house.
Not only that but the essential oils present in the diffusers promote relaxed and deep sleep. Additionally, diffusers can also help with anxiety, any emotion, and stress by relaxing your body and mind. If you are looking for a great brand and great diffusers, check these out.
3. Have suitable decor in the room
Décor plays an important role when it comes to adding a soothing vibe to the home. Here are a few tips that can help:
Try to have lighter color paints in your room, following a neutral color scheme is suggested. Avoid darker colors, including blue and purple as they can make the room look compact. However, if you do go for darker colors, make sure you paint it on one wall and leave the other three walls white. (unless it’s the bedroom which you will want darker colors to be able to sleep)
Let natural light come in. Once again, dark rooms do the opposite, they can make you feel restless and suffocated. So, it is suggested you allow natural light to come in. For this, open the windows and go for sheer blinds (If morning rays are your concern, try using a sleeping mask, or have a mixture of light-blocking curtains and sheer/white ones.
Add plants to the rooms – Plants can promote a natural and soothing vibe around the house. Add them but make sure you don’t add too many of them only to make your home look like a jungle. Keep the plants near the windows, where they can get sunlight.
4. Light aromatic candles
Candles with essential oils can produce aromas even if you don’t light them. However, as is obvious they’ll be the most effective when burnt. Nonetheless, try to add some candles to the décor. However, do make sure that you keep them away from combustible objects such as curtains and bedsheets.
If you don’t use candles, you can get diffusers with lights and use those instead, which is what I prefer if I want to create an ambiance. If I don’t but want the scent, I turn off the light on the diffuser and it works the same.
5. Work on the lighting
Little things matter, this includes lighting as well. They can have a tremendous effect on your senses and overall mood. Dim warm lights for that matter work the best to make your home comfortable, cozy, and serene, all at the same time. Having said that, you might want to avoid white tube lights, neon, and pink ceiling lights.
However, if you already have them, you can add lamps to create a more soothing and comfortable look.
6. Add a Himalayan Rock salt lamp
Himalayan Rock Salt lamps not only serve as a splendid piece of décor but have many health benefits. They promote a peaceful ambiance, improve the air quality, help you sleep better, and lighten up your mood.
It has a light bulb attached to it on the inside but the magic lies in the Himalayan salt that the lamp is made of and gets its’ name.
7. Play soothing music
You would not be stranger to the fact that music has been proven to calm one down, and improve mood. Ergo, this is what you must do – play some soothing music around the house. Refrain from playing any Billboard hits, go for instrumental music. You can even play calming background sounds, such as those of waves and rains.
Lastly,
Well, I just spilled the tricks to make your home feel like heaven. After all, your home is your sanctuary. Let it be the place where you can relax, unwind, and be who you are. Who knew, the secret of peace and calm can be your cozy room?
Hey there, how do you make your home calm and peaceful? Feel free to share some extra tips with everyone in the comment section.


 spices. The alternate version is to make it on the stove by simmering the ingredients. It’s frequently created around the holiday season.
 holiday gift, wrap it in craft paper or burlap and tie it off with ribbon or baker’s twine.


 calming décor – white, grey, and nude colors are in trend for their minimalist touch. So, whatever you pick, it is suggested you pick from the neutral color scheme.
 would it feel? Time to make your imagination a reality. There are so many ways of doing so.
 them someday – which I bet never comes.
 senses. They can be electric or contain tea-lights and tea-holders to produce mesmerizing fragrances around the house.
 effective when burnt. Nonetheless, try to add some candles to the décor. However, do make sure that you keep them away from combustible objects such as curtains and bedsheets.
  peaceful ambiance, improve the air quality, help you sleep better, and lighten up your mood.
Recent Comments